Friday, September 6, 2024

Car Battery Jumpstart - 70mai PowerBank

I purchased this 70mai Jump Start powerbank somewhere towards the end of the Covid quarantine periods. Car battery died due to long periods of inactivity.

How you use them or any other similar jumpstart powerbank.

Below are the steps in general

1. Connect Red/(+) clamp to Red/(+) terminal of dead battery
2. Connect Black/(-) clamp to Black/(-) terminal of dead battery
3. Press the Boost button 
4. Now try to start your car.

If it failed to start you will need to disconnect and repeat the steps again.
This is because the amount of charge the power bank has per attempt is limited.

I show here if you short the clamps, sparks happen but only for a short time


Monday, September 2, 2024

Spring Cleaning.
Purging about 25,000+ posts generated from IFTTT over 15 years

Sunday, March 2, 2014

i10: HID Conversion


Just back from a friend's shop (SmartTint Auto Accessories) completing a 35W 4300K HID upgrade for the i10's standard H4. The kit is branded as TRUST Power Live. Paid RM450 for it.
Can't test until it gets darker. The ballast for this is slightly large compared to a OSRAM kit's ballast which was about the thickness of an iPhone.

HID Kit:
Brand - TRUST
35W 4300K with High/Low beam.
RM450

Installation:
i10 does not leave you much working space. An additional hole on the light housing had to be made to accommodate the extra wires going to the ballast. The ballast was mounted to the body side walls, above the tyre well.

You guys might be thinking about the reliability. My only guarantee is the trust I have for them giving me a worry free product that works. There was another cheaper one going for RM200++ and a more expensive one but the recommendation is for this instead of the higher end one. So far they have not let me down yet. Fingers crossed.

As a result of this upgrade I now have 1 pair of H4 Phillips Extreme Vision to let go for RM50. These were in the car for 3 months.

*Update 9 March 2014 - Lights looking good. The reflector does not seem to exhibit issues where there is scatter all over the place. Beams are looking in focus to shine on where they are suppose to be. Will be going back to SmartTint to have the telescopic type installed as I want to have a functional high beam.

*Update 16 May 2014 - SmartTint gave me a free replacement to those that was the telescopic type. But for some reason, I think free stuff does comes with a price. These turned out to be 8000K. Too damn white for my liking. What people say is correct, you can't see shit when it rained. So i ended up getting a pair of 4300K from EBay for about USD10. Took about 4 weeks to arrive. When I replaced it, i noticed extra cabling. There was an additional relay unit for the telescopic unit. How else would it have moved right? Not much problem, just swap out the cables matching the colours and it was done deal. With these 4300K, i hope it stays clear of the law.


Saturday, March 1, 2014

Downsizing Experiment: Hyundai i10

ODO Reading: 40244km
Date: 3/1/2014

Downsized
Stock i10 wheel size is 165/60/R14 in Malaysia. Converted to Michellin XM2 165/65/R13 with new alloys. Cost RM720 at Bok Tyre Jalan Mahsuri. They were very kind enough to entertain my experiment and providing input to what possible sizes should be use. They even offered to lend me metal rims to test the theory out. Thank you sir!!

Right off the I can feel the drive is a bit more muted with that extra 5mm of rubber. All I can provide is butt feel as I do not have the instruments to measure the potential changes. Per the calculators, this conversion causes the car to be lower by 9mm and speedo increments by 1%

Hyundai UK's website has a SE Blue Version which offers better fuel economy. The tyre spec for that unit is 155/70R13. I guess car companies here are pushing for the mass market appeal where clients want better looking rims (bigger also) instead of fuel economy. 

Will be posting updates on the mileage and fuel consumption as I have them.

*just checked the spare tyre - 155/65R13

*Update 9 March 2014 - The first full tank reads at 10.5km/liter in mix urban with all the revving from the much more speedier response at wheel. Doesn't look that promising at this point. Fingers crossed for better results in coming refuels.

Sunday, February 23, 2014

Wrong wheel/tires can wreck your MPG

This was a post from the forum Ecomodder. 

Prius 15's are better than aftermarket 17's! (Wrong wheels/tires can wreck your MPG)
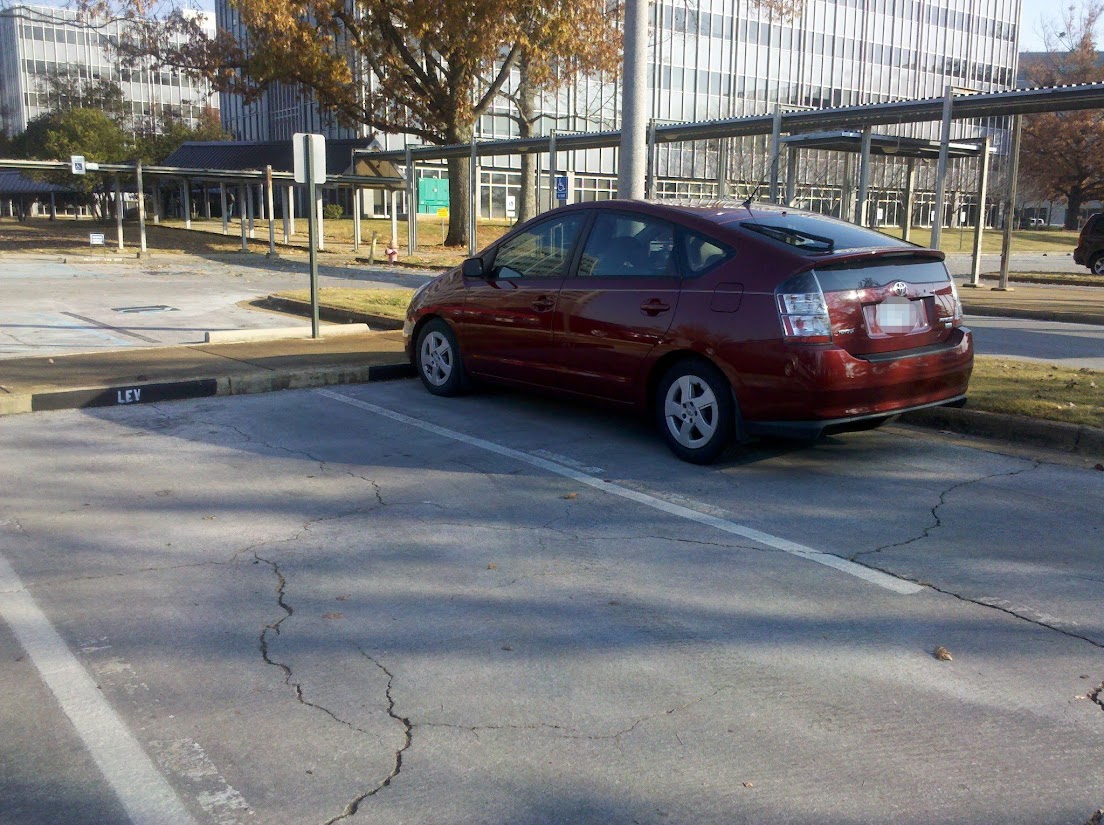
So, about a year ago, I broke down and purchased a "new to me" Prius. A 2004 with all the bells and whistles from that year. Among these was a set of 17" rims that I was never really crazy about (I just didn't think they matched my car). So after a year of driving and getting low to mid 40mpg's, I told to my wife I wanted to swap tires with her car (also a Prius, but an '05) so I could test what the difference in MPGs would be. She said she didn't care, so I could do whatever I wanted. I swapped them between vehicles. My MPG went up, hers went down. I had half a tank with the 17's, and half with the 15's, and my MPG went up to 52mpg! She took a 1000 mile road trip, and her interstate MPG went down to 38 (normally mid to upper 40's)! Apparently the rolling resistance of those 17's was terrible.
She really hated the tires, and told me to give hers back, so I did... but not before I found a set of 15" Prius rims (from a 2010) and mounted some Bridgestone Ecopias to them :-). My first tank with the Ecopias came in at a whopping 64mpg! I am going to have to check a few more tanks, since it was a half tank (~250 miles) on account that we would be leaving on a trip. We currently have my car and are traveling on twisty, turney mountain roads in the middle of nowhere, so the next couple fill-ups may not tell much, but so far, EVERYTHING is better than it was. Road noise is reduced, acceleration in increased, tire mass is down, MPG is up (20% or more), the wife is happy, and I like the look of the new rims/tires on my car a lot better. If you are running 17's, just know, you could be paying an awful price for it!

This image has been resized. Click this bar to view the full image. The original image is sized 1104x825.

This image has been resized. Click this bar to view the full image. The original image is sized 1238x825.

Source: Ecomodder.com